The instructions below assume that you have created an image file for the map. If you have not done so, see the description for how to create an image file using OCAD 8 or OCAD 11.
First log in with your Eventor username (personal identity number) and password via the login link to the right in the page header. If you are unsure of your password, check the guide on Eventor or ask your club administrator.
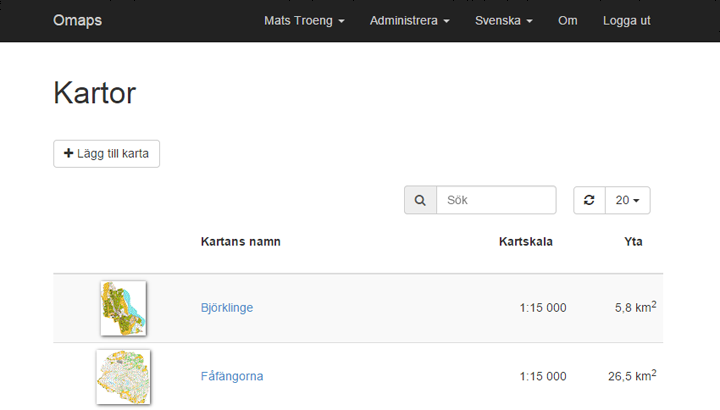
When you are logged in, click the Administer link in the page header. A list of maps you have permission to administer will be displayed. Click a map's name to administer it, or click the Add map button at the top.
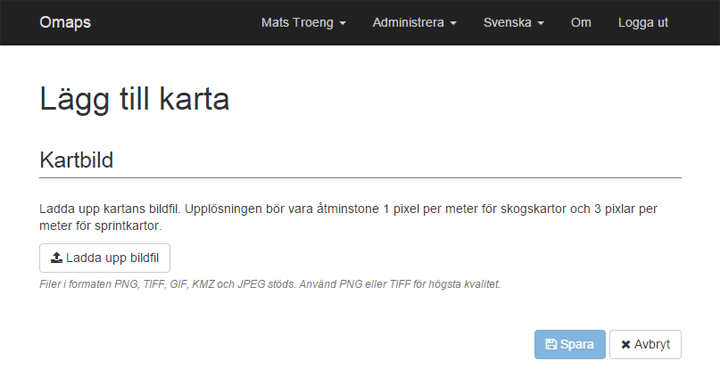
When you have clicked Add map, a page is shown where you upload the map image file. Uploading an image file is mandatory. If the file is large, the upload may take a while, especially if your connection is slow.
Georeference the map
Once the file has been uploaded, you will be asked if there is an associated world file containing georeference information.
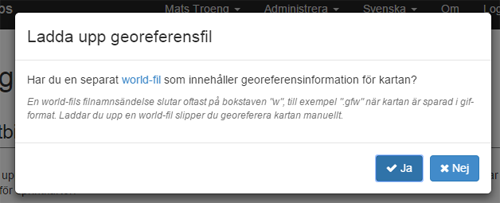
If you exported the map image from OCAD, the world file is located in the same folder and has the same name as the map image, but with a different file extension ending in “w”. GIF becomes “gfw”, TIFF becomes “tfw”, and so on. Click Yes and select the file. If you do not have a world file, click No and you will then have to georeference the file manually.
Georeferencing with a world file
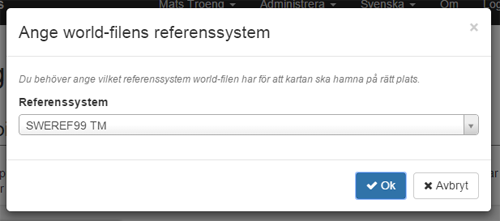
When the world file has been uploaded, you will be asked which reference system has been used. The most common one for orienteering maps in Sweden is SWEREF 99 TM.
Manual georeferencing
The manual georeferencing page is divided into two halves. In the satellite image on the left you mark two or more points, and in the map image on the right you mark the corresponding points. The first time you visit the page, you may be asked whether you allow the page to use your current position before the satellite image loads. If so, answer yes.
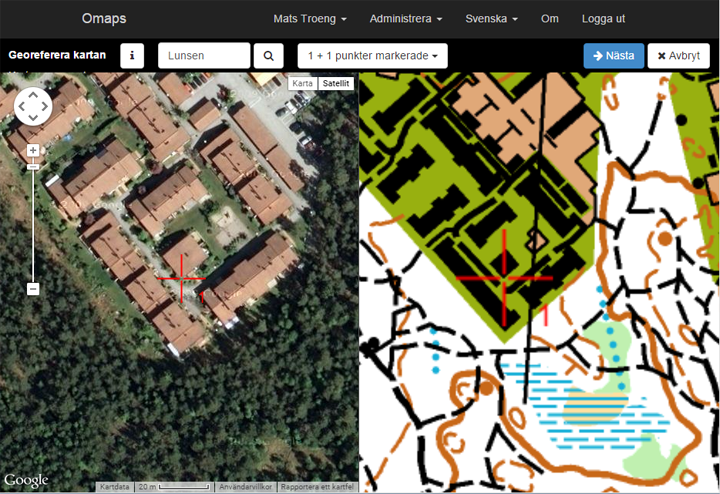
Find a distinct point in the satellite image—good points are usually building corners or road intersections—and click on it. A red crosshair will indicate the position. Repeat the process in the map image on the right. You can zoom in and out of both images using the mouse wheel, and move the images by holding down the left mouse button and dragging. Repeat the process until you have two pairs of points marked. The point pairs should preferably be placed in opposite corners of the map for the best precision. If the map has distortions, it is wise to mark more point pairs so that a mismatch for one pair does not have too great an effect. If you accidentally place a point incorrectly, you can delete it via the dropdown menu at the top. Click Next when you are satisfied with the selected point pairs.
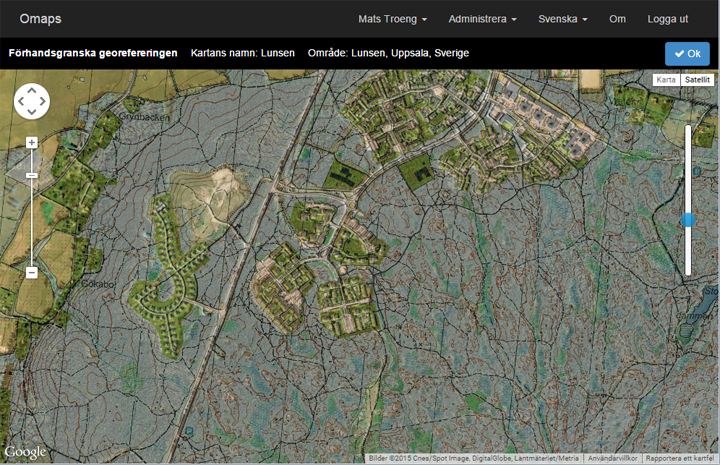
Preview of georeferencing
Check that the map is correctly aligned over the satellite image in the preview shown. You can zoom with the mouse wheel, and move by holding down the left mouse button and dragging. In the vertical slider on the right you can adjust the map image transparency, making it easy to ensure proper alignment. Click OK if it looks good, or Redo georeferencing if a manual georeferencing needs to be corrected.
Enter the map details
There you go! The map image is now uploaded and georeferenced. Time to fill in the map details. The information is divided into several categories.
General information
Here you enter the map’s name, area, etc. Mandatory fields are marked with a red asterisk. Note! The map name should not include scale, year of publication, or similar information.
Area
Here you mark the area covered by the map. Omaps.net attempts to automatically extract a polygon that covers the area, but you should review the suggestion and make necessary adjustments. Note that the uploaded map image is not affected by how the area is chosen.
Copyright
Enter the organization(s) that hold the copyright for the map. The information you provide here is not used to restrict access to the map in Omaps.net but is only informational.
Access restrictions
Select the people and/or organizational roles that should have access to edit the map. People and roles are retrieved from Eventor. You can also specify a date until which the map should be hidden from other users. This function is useful when uploading a new map in advance of a competition without making it available to participants. By setting people and roles appropriately, only competition officials, cartographers, and course planners can be given access to the map. These access rules apply in Omaps.net as well as in other systems that retrieve maps from Omaps.net.
Sharing
Here you decide which external services should have access to the map, and in what resolution. You can specify different resolutions for different services. Just remember that the resolution must be sufficient for the services to use the map effectively.
Files
You can upload files associated with the map. For example, the map’s OCAD file can be stored here. The files are accessible only to the people and roles specified under Access restrictions.
Save the map
When all information has been entered, click Save. The map is saved in the database. At the same time, image files in various resolutions are created in a background process. This may take a few minutes for a large map. Maps whose image files are not yet ready are displayed with a loading spinner in the map list.